Like many, we tend to fantasize about harvesting delicious fresh vegetables and fruits in the middle of winter when there is snow on the ground.
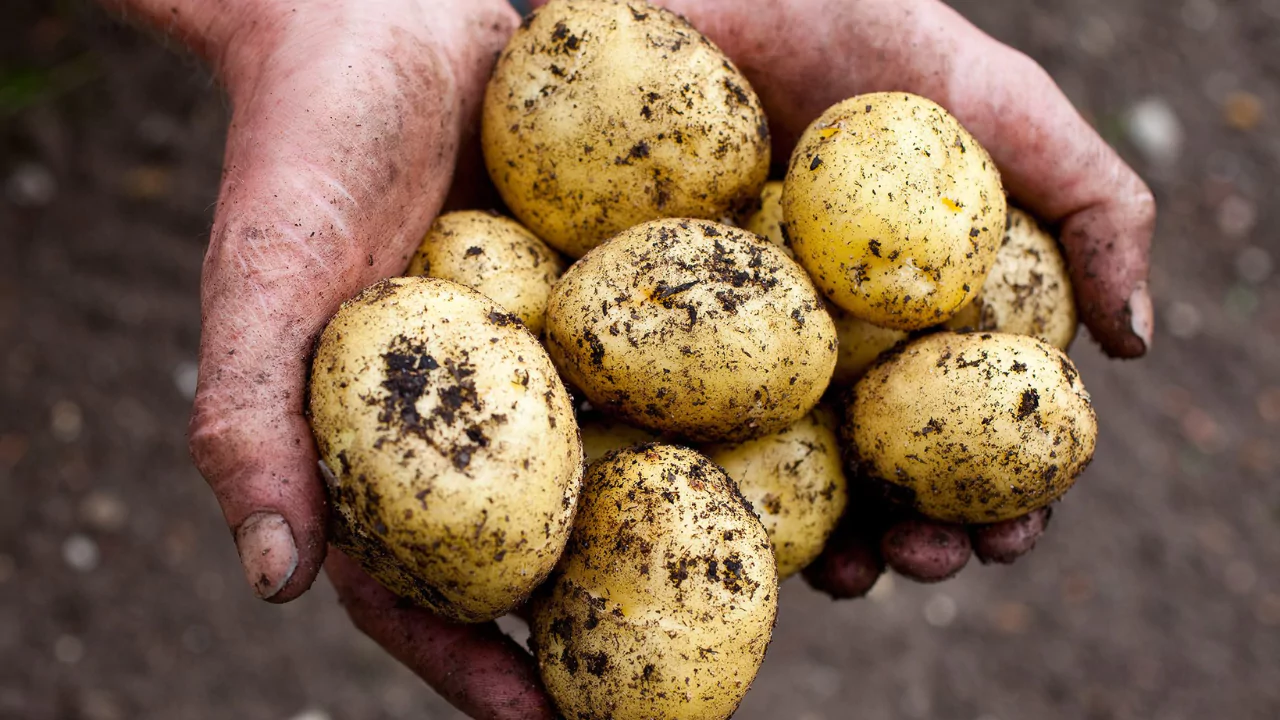
Oh, how the common potato teases us. Being one of the essential staples, potatoes mark the diet of numerous households. Even while getting sprouted, the potatoes intimates towards the upcoming gardening season.
Without a doubt, the majority of us swoon over the very idea of planting those sprouting potatoes when spring arrives. Such an overwhelming temptation that comes from life.
Regardless of the reason that brought you to this site, we are pleased to inform you that quotes from numerous experts indicate that growing potatoes from store-bought tatters is much easier than anticipated.
Seed Potatoes vs Store-Bought Potatoes
Experts disagree on whether store-bought potatoes should be planted. While some claim store-bought potatoes are meant to be consumed, numerous others have had success growing fine tubers from the store-bought variety.
Nevertheless, for some potato lovers, the recommendation is to plant using seed potatoes. They make the claim that this option is more conservative than usng the strare bought option. But how do these differ?
In essence, seed potatoes are just normal potatoes – they are tubers that have already been grown and are replanted. These potatoes are given to gardeners or farmers, whose wish is to reproduce from the seed they are given.
Certified disease free seed potatoes should be purchased in my opinion. Such have gone through criticism of faults and have gotten a state provided stamp of approval.
This type of potato is mostly encouraged as they help avoid destruction to crops and soils. Without proper care products, you run the risk of introducing harmful diseases with infection that last for a long time.
They are supposed to generate bountiful harvests and ensure outstanding quality plants of superb grade. Garden centers often have an inventory of certified seed potatoes to select from. These are grown in 15 states known to provide ideal conditions for potato farming:
- Idaho
- North Dakota
- Colorado
- Maine
- Montana
- Minnesota
- Wisconsin
- Nebraska
- Wyoming
- Oregon
- Michigan
- Washington
- New York
- California
- Alaska
Potatoes purchased from shops can also be treated, but their treatment uses sprout-inhibitors. These treatment methods stop the eye’s budding from occurring during the period of storage or shelving. Such blockade can stifle the formation of new crops and reduce yields.
Remember that the higher the temperature of your storage facility, the sooner and quicker the potatoes will sprout. An average dormancy period is somewhere between 2 to 3 months based on the method of storage, type of potato, and temperature of storage.
At the very least, use organic potatoes because they have not been treated.
Can I Grow Potatoes from Store Bought Potatoes?
If the potatoes bought from the store do begin to sprout, then you should consider planting them. Store-bought stubborn potatoes can be easier to find as well, which is a great perk, but also offers the added benefit of instant immediate access, unlike certified seed potatoes which incur a long waiting period and delivery process.
You won’t get too much out of attempts to grow potatoes from soft sprouted potatoes found in grocery stores. At seed potatoes, you wouldn’t have any benefits over buying-supermarket-potatoes and you can always use them for compost. Seed potatoes are no more expensive than the ones purchased for eating.
The Potato Planting Process
The Right Quantity of Potatoes to Plant
Determining the number of potatoes to plant is a flexible decision along with being a tricky task to undertake. Two factors will determine your decision:
- The number of potatoes you plan on consuming or selling
- How much space you have to plant crops.
Some gardeners cut their potatoes into chunks before planting them. This should be avoided as the opening of the potato exposes the insides which increases susceptibility rot, disease, and pests.
While these factors differ among the different types of potatoes you have, most varieties are based off these averages.
In determining the number of potato tubers and the spacing between them in your garden, the following points may be useful to consider:
| Planting Aspect | Quantity |
| Weight of average potato (ounces) Cut large potatoes into different chunks but keep small ones as they are. | 1.5 – 2 oz |
| Space between each standard potato (inches apart) Space determines the size of your potatoes. The closer they’re planted, the smaller your tubers come out. | 8” – 12” |
| Minimum number of eyes per potato or chunk Always grow your potatoes with eyes upward. | 1 |
| Average yield ratio of seed to crop cultivated (pounds) Higher yields mean you have healthier soil to plant in. | 1:10 |
The Ideal Fertilizer to Use
Fertilizing your soil without conducting a soil test first is dangerous, as one can easily guess how healthy their soil is. That is what your soil wishes, without anything excessive or detrimental to its health.
The ideal soil environment for your potatoes to grow in includes:
- Soil blended with decaying leaves and directly with compost and the remaining necessities are nitrogen, phosphorus, and potassium.
- The pH that is required lies within the range of 5.0 to 6.5.
- Soil that does not accumulate foliage for a year that has been in intensive Turf treatment.
- Loam that has no decaying green foliage.
Even after planting, it is important to control the quality of your soil by performing soil tests.
What is the Best Time of Year to Plant Potatoes?
The planting of new potatoes is not a fairly easy task as it requires initial work one starts at the the beginning of the growing season.
Prepare the soil and bed well before the planting; allow 2 to 6 weeks of idle time.
The ideal period for planting is early spring after the frosty weather has subsided, when temperatures hit 45°F and the soil temperature begins to increase.
How to Plant Potatoes
1. Loosen the soil in the planting region to a depth of 10 to 12 inches to prepare the area for planting.
2. Apply soil fertilizers that are rich in nitrogen.
3. Dig trenches in the soil 4 inches deep and make sure to space each potato 4 inches apart.
4. Cover the potato pieces with about an inch of soil.
5. Water your potatoes plant, especially during the flowering stage when they’re producing tubers.
As the plants grow, mound the soil around the stem. It will eventually look like you planted the spuds in a hill. Dig potatoes from the raised bed rows and take out any vines. Begin the process of harvesting potatoes and putting them into bags.
Taking Care of Your Potato Plants
Hilling Potatoes
Every farmer and gardener knows that to plant potatoes the easiest way is to hill soil around where they will be planted. This is the method of creating smaller mounds of soil around your tubers. Always hill your potatoes because it helps you:
- Bring down the amount of weeds your potato plants face in the spring by removing unsolicited and wild plants.
- When you seed potato plants establish an ideal drainage system so your new potatoes are not sitting in water.
- Shield the potatoes from sunlight. This causes photosynthesis and the greening of your plants. This is the time when your potatoes will undergo greening.
- The yield of your plants will be increased. As you plant the tubers, they will develop two types of stems. One type will bear foliage above the soil and the other type is the new potatoes below the soil.
Watering Your Crop
Once a week, providing your potato plant with one to two inches of water should be adequate. For various other reasons, water requirements become increasingly important during the first 90 days:
- The First 30 Days: Your potatoes require water, but not in critical amounts.
- 1 – 2 Month Period: Their water requirement is critical for crop development.
- 2 – 3 Month Period: Water is required for the potatoes to expand.
- 3 – 4 Month Period: Water is still required, but not in the same amounts as previously. This period is just before harvest when the tops of the plants turn yellow and die out.
Pest Control
Common insects that attack potatoes include:

While controlling potato plants, ensure your crops are guarded against pests:
- Before they appear.
- During the entire growth cycle.
- After the harvesting stage.
To achieve adequate pest management, you need to:
- Change your crops on a regular basis.
- Maintain constant surveillance for any eggs, larvae, or mature insects.
- Collect excess insects and submerge them in water or crush them if they are in sight.
- Apply to your crops soft pesticides depending on what type of pest you are facing.
Harvesting
When to Harvest
The timing for harvesting potatoes is informed by their variety as well as the maturity it has undergone. The use of a calendar is not the best way to harvest potatoes. Having a thorough understanding on the variety and their Days To Maturity (DTM) will help considerably.
Most varieties will mature within 90 days and it’s best to plant those that won’t take more than 4 months to grow. You should also consider climate related issues, like summer heat that can be problematic.
How to Harvest
When the time comes to harvest potatoes, you can do this manually, or else hire someone who will assist you with broadforks, digging forks or other relevant tools. Steps include:
- Using your own hands.
- Using your hands combined with a broadfork.
- Using a digging fork alone.
Looking at best practices, you should start digging around the bed’s boundary. This way, partnered with the tools mentioned, you will avoid puncturing the tubers that are beneath the surface and beyond your vision.
If done properly, the harvesting process should be hassle-free, allowing you to simply wait for the tubers to dry after picking, dry storage in a cooler place free from sunlight following removal. This will enable you to ease into the next step of selling or consuming.